How to replace the keyboard of the Acer Aspire One A110
Five minutes, no special tooling required! (March 2012)
Replacing the keyboard of the Acer Aspire One A110 is very simple. It takes five minutes and does not require any special tooling. While we're showing you how to do it, we'll also give you a trick to work around a design flaw that often causes Aspire One keyboards to stop working in the first place.
These instructions and photographs are for the original A110, but it should also work just fine with the ZG5, AO751H and many, many other Aspire Ones.
The how-to
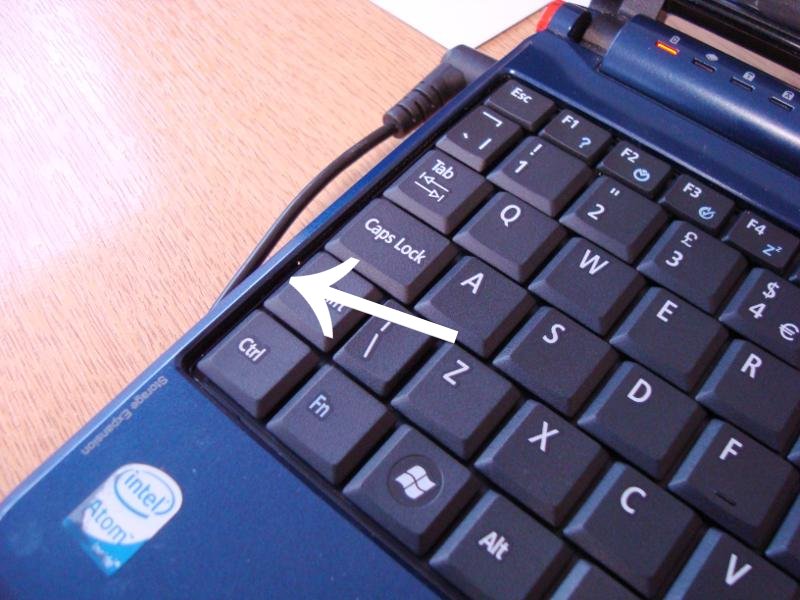
Step 1: Find the keyboard retaining clips
There are three clips just above the keyboard. One is above the F2 key, one is above F8, and one is above the Pause/Break and Insert keys. They're arrowed here:
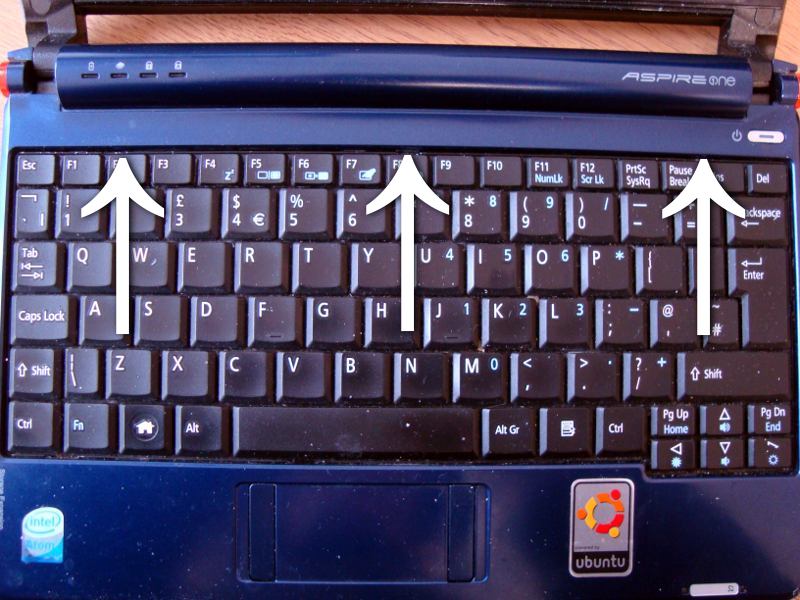
Push these clips in with a small, thin flat object; a flat-bladed precision screwdriver will do very well, if you have one. As you do this, you should notice that the top of the keyboard will pop loose.
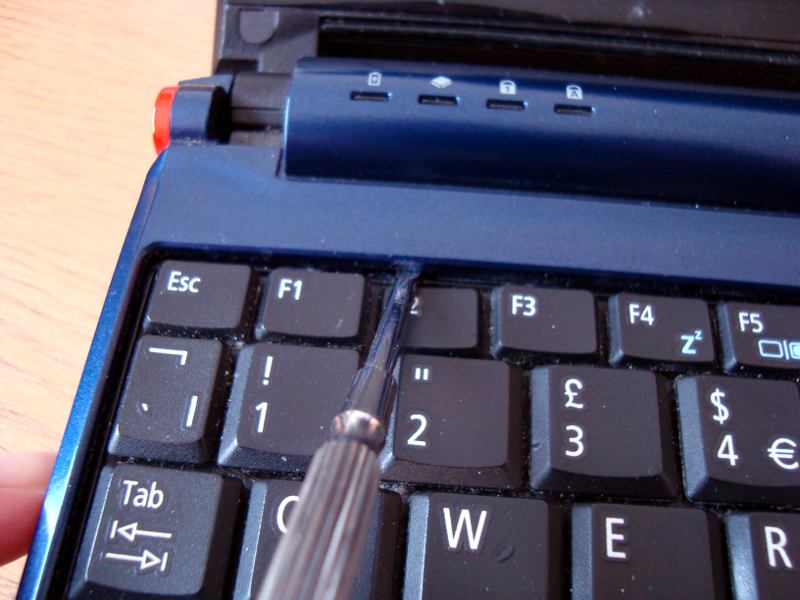
Other Aspire Ones may have four clips; we know the AO751h does
Step 2: Liberate the keyboard
Once the top of the keyboard is free, you should be able to lift the keyboard away from the case (you still have a ribbon cable underneath to undo, so don't yank it away too hard!).
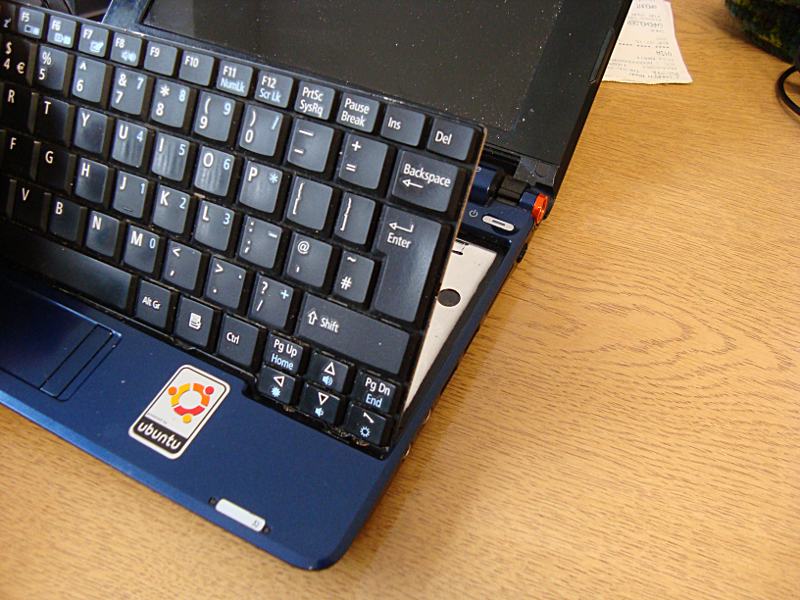
There are what appear to be two clips on the side that you don't need to undo; the inherent flex of the keyboard will ensure that these won't interfere with removing it. Here's one of them:
Step 3: Remove the ribbon cable
The ribbon cable for the keyboard is latched in place. Here's the clip:
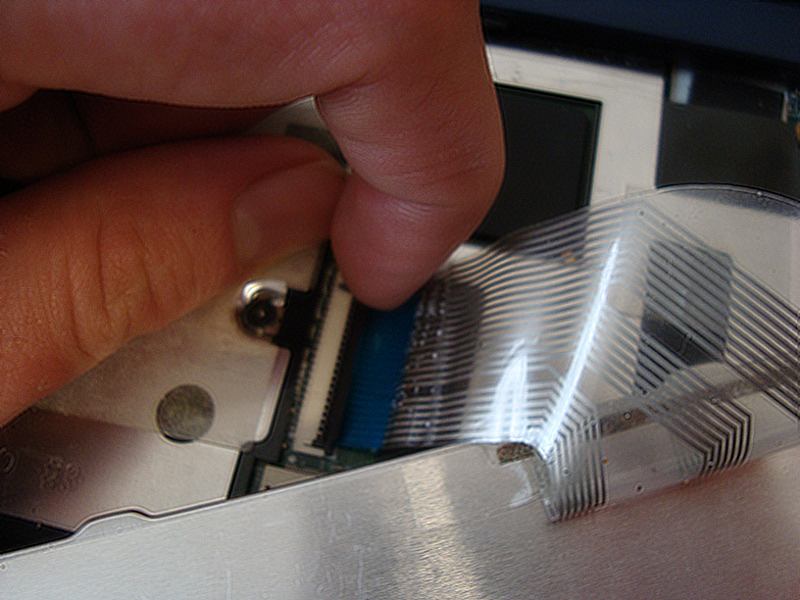
Lift the black part of the clip; it's hinged and it rotates along the length of the clip. Remove the ribbon cable, and your keyboard will now be free.
You might want to keep your old keyboard in case one of your new keys breaks off and get lost.
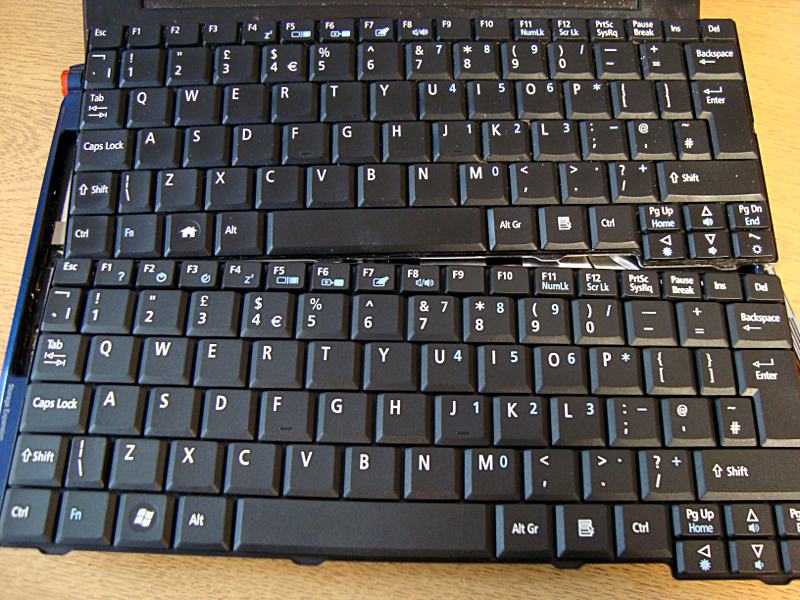
Top: old keyboard. Bottom: New one.
Step 4: Card Trick!
Here is the secret trick to get more life out of your keyboard! We'll discuss why this works later, but for now, you need to cut out a square piece of thin card (UK train ticket thickness is fine), a little bit wider than the width of the keyboard ribbon. It should look something like this:

Subtle plug!
It should cover the edge of the gap in the casing (silver) over which the ribbon cable passes to get to its clip.
Step 5: Fit your new ribbon cable
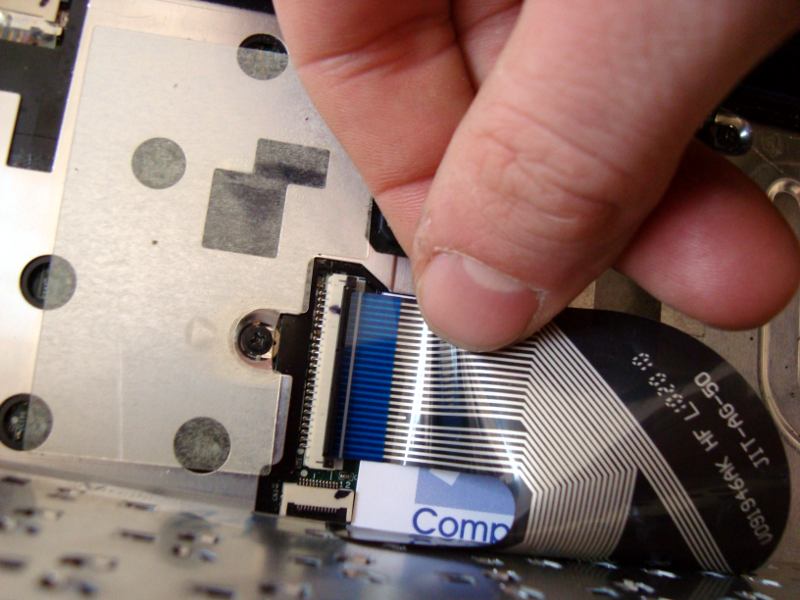
No surprises here; slide the ribbon cable of your new cable into the slot and push the black clip down to hold it in place. This is a zero-insertion-force slot, i.e. it should require no force at all to slide into place if the black clip is undone. (Check your new keyboard's ribbon for protective tape on the tip!)
Step 6: Fit the new keyboard
You want to slide the bottom of the keyboard in place first. There are four notches in the casing, with matching protrusions on the keyboard. Here's one of the notch/protrusion pairs:
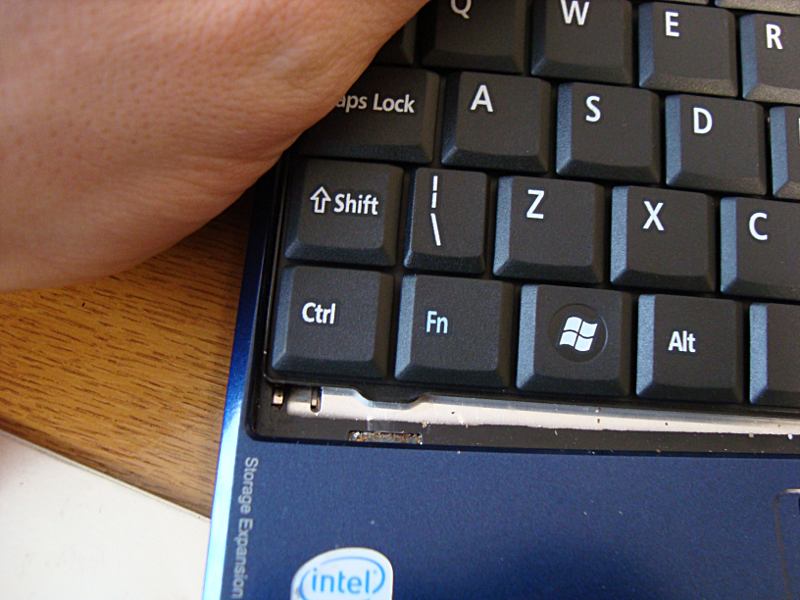
Once the bottom of the keyboard is in place, simply push the top of the keyboard down and it'll clip into place.
You're done! Enjoy getting many more years of life out of your A110!
Sometimes, due to wear or previous removals of the keyboard, one or more of the clips at the top will refuse to clip in place. If so, just put some double-sided sticky tape underneath that part of the keyboard to hold it in place, and put a weight on top of it for an hour or so to ensure that it's stuck firmly in place. (If this sounds crude: It is! But did you know that this is how iPads are held together? We found this out the fun way!)
Where do I buy a keyboard?
eBay!
As of early 2013, the keyboards for the A110 are readily available brand new, and very cheap; they are less than £10 shipped in the UK from eBay. For those of you in the UK, a little digging through this search will find you one.
The design flaw
A design flaw with the A110, and other Aspire Ones including the AO751, is that the keyboard ribbon gets creased against the gap in the housing (the gap which gives you access to the slot into which the keyboard ribbon goes). You can see the crease that forms in this photograph:
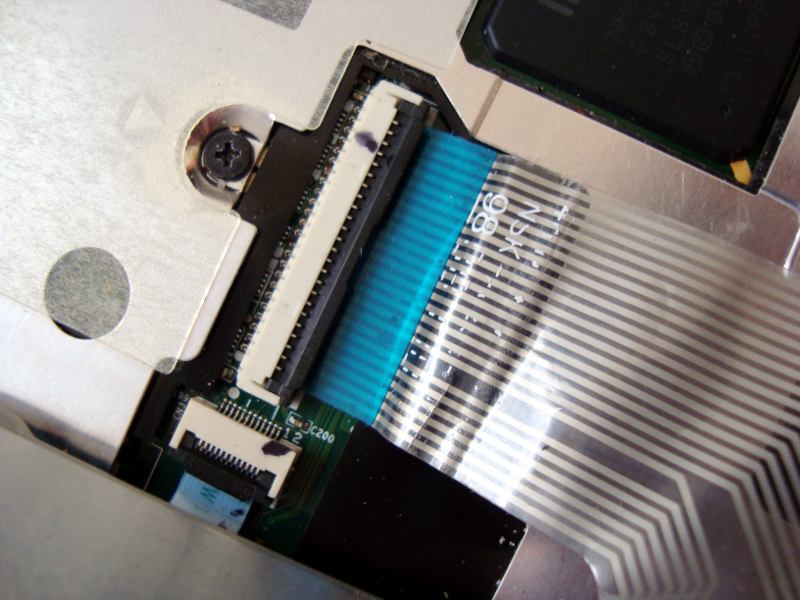
This will only become apparent after either very heavy use or many removals of the keyboard (in our case, it's a combination of both), but eventually this will cause the keyboard to stop working properly. A symptom of this is that some keys will work and others will not. Sadly, you cannot replace the ribbon cable by itself. Sometimes using a plastic splint and sellotape remedies this, for a time.
This was the purpose of the piece of card earlier; it provides a smoother "ramp" for the ribbon to rest against. This should give you many years of extra use out of your keyboard!
Plug
As well as repairs & diagnostics of old laptops (and anything else you care to throw at us), we do many other things like web design and other IT services. Don't hesitate to contact us with your queries.
Copyright
Copyright © 2013, AJ Computing.
Permission is granted to copy and/or modify the text and pictures of this article for any purpose, provided that a link to this page is given.

